Easy DIY Easter Decor Ideas Using Budget-Friendly Finds

Sometimes the prettiest seasonal decor doesn’t come from a big shopping trip — it comes from mixing affordable finds with what you already have at home.
Today I worked on two simple Easter arrangements — one for our dining room table and one for our small porch. I wanted both pieces to feel fresh and spring-inspired, but still cozy and personal.
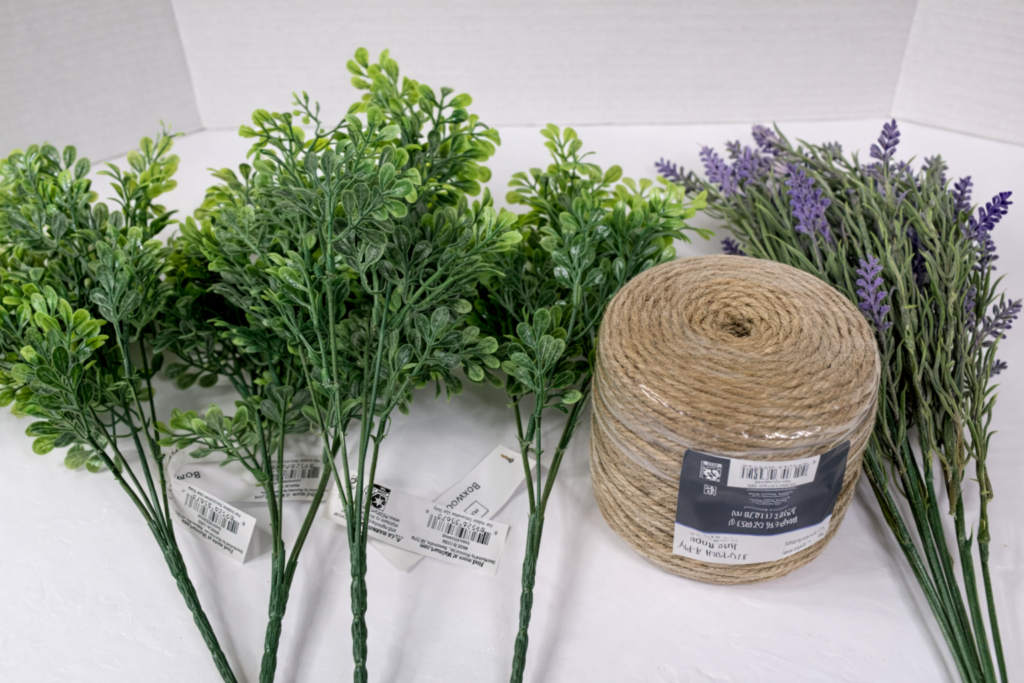
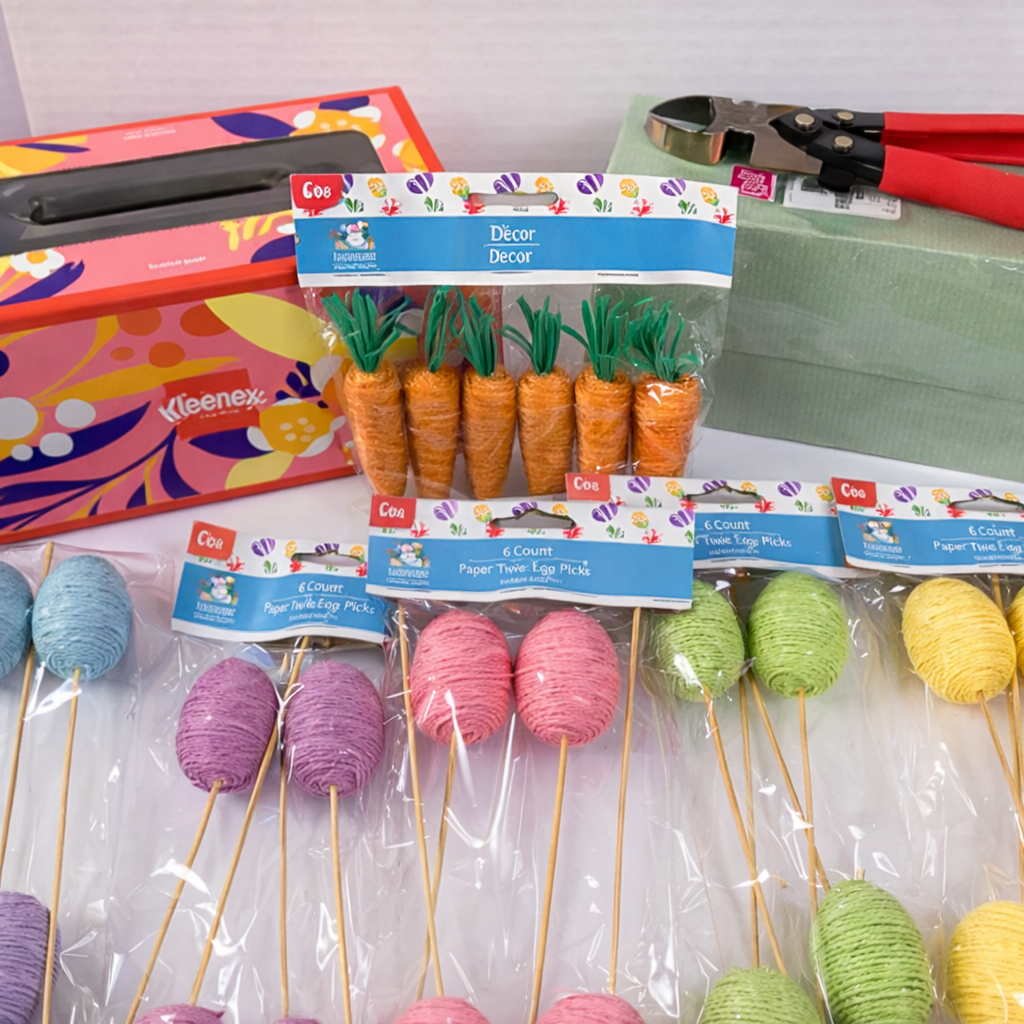
For this project, I gathered greenery picks, lavender stems, and jute twine from Walmart, and found the pastel egg picks, carrot decorations, and green floral sponge (the foam block used to anchor stems) at the dollar store.
What I already had at home helped bring everything together: a floral cutter, glue gun and glue sticks, and even a simple tissue box that became part of the base structure for the larger centerpiece.
The dining room arrangement turned into a fuller Easter centerpiece layered with greenery, lavender, pastel eggs, and carrots for a soft rustic look.
The second piece — my little turtle planter — is going out on our small porch. It’s simple, cheerful, and welcoming. The greenery and lavender keep it feeling light and springy, and I love that it adds a subtle seasonal touch right at the entrance.
I enjoy projects like this because they don’t require anything complicated — just layering textures, mixing colors, and using what you can find at a good price. It’s a reminder that decorating your home doesn’t have to be expensive to feel thoughtful and beautiful.
These small touches instantly made our home feel brighter, warmer, and ready for spring.
How I Made This DIY Easter Arrangement

Step 1: Wrap the Tissue Box with Twine

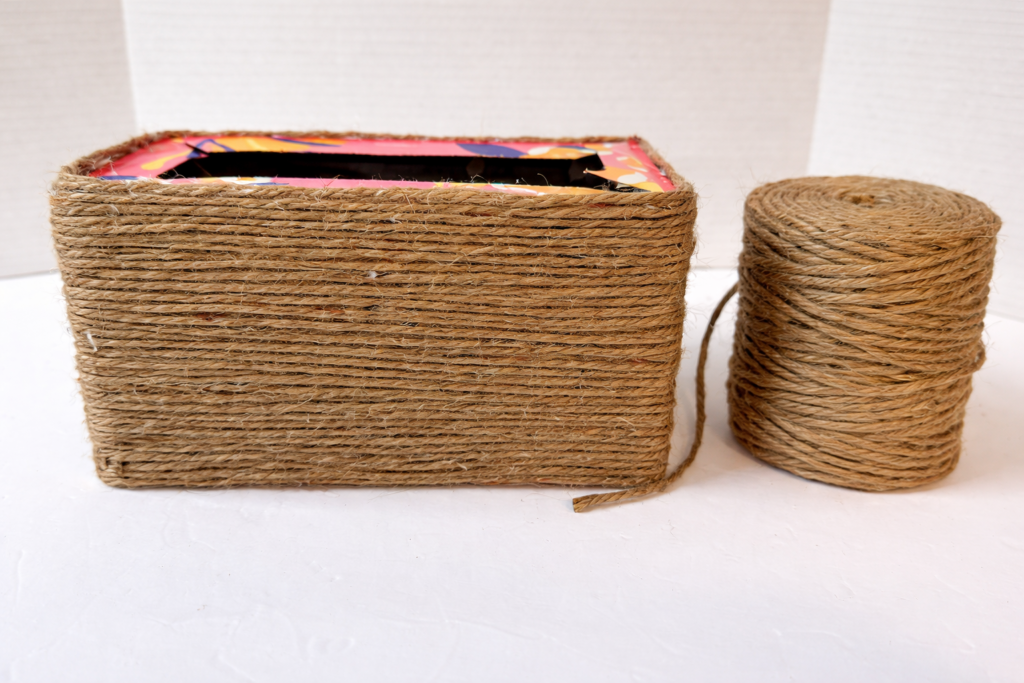
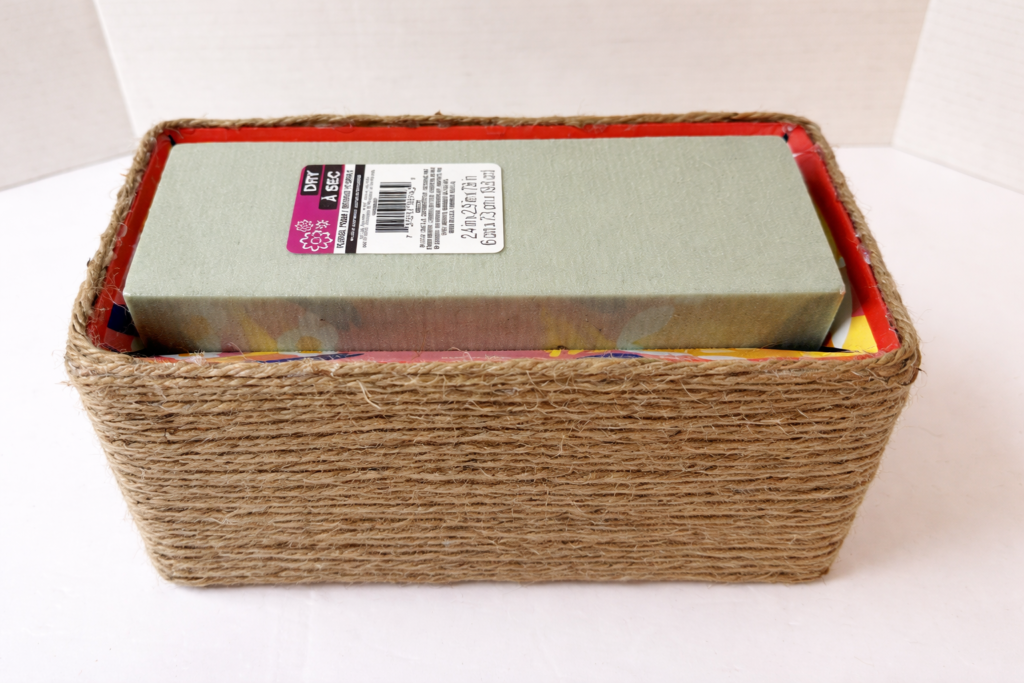
I started by wrapping the tissue box with twine all the way to the top. You can also cover the bottom portion if you’d like, but I only wrapped the areas that would be visible once the arrangement was complete.
The twine I used was thinner because that’s what was available at the time. If you can find a thicker twine, it gives an even more rustic look — but the thinner one still works beautifully.
I secured everything with hot glue as I wrapped.
Step 2: Add the Floral Sponge
Once the box was fully wrapped, I placed the floral sponge inside.
To keep it from moving around, you can:
- Add stuffing inside the box to hold it snugly in place
- Or use a bit of hot glue to secure it directly
Either method works — you just want it stable before adding the greenery.
Step 3: Cover the Sponge with Moss
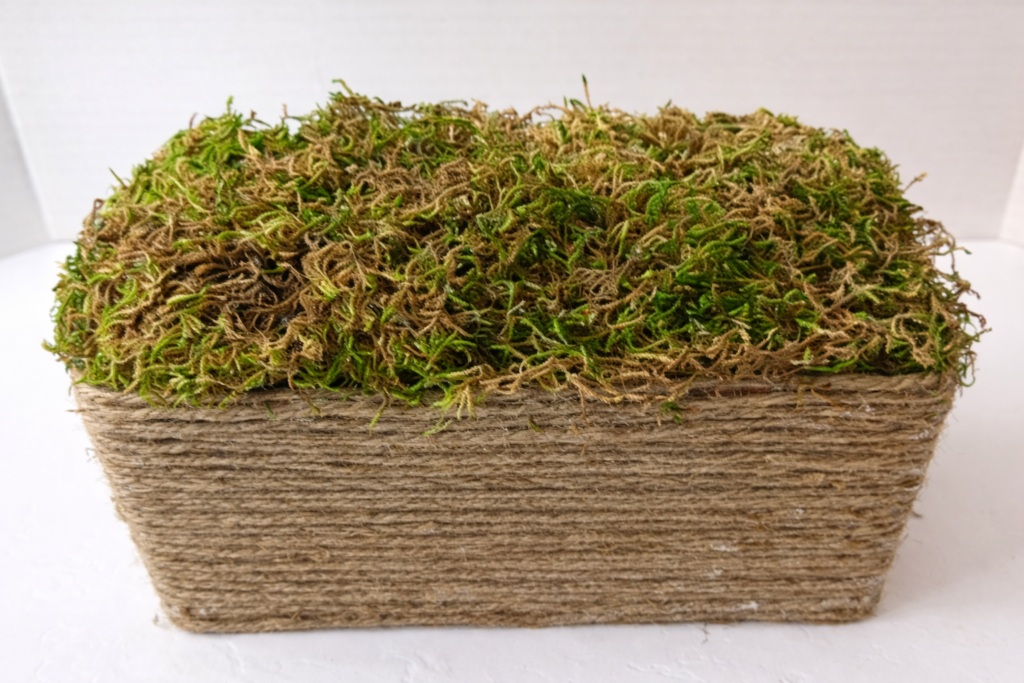
I had leftover moss from a previous project, so I added it on top to completely cover the floral sponge. This gives the arrangement a more natural and finished look.
It also helps hide any gaps between stems later on.
Step 4: Add the Greenery
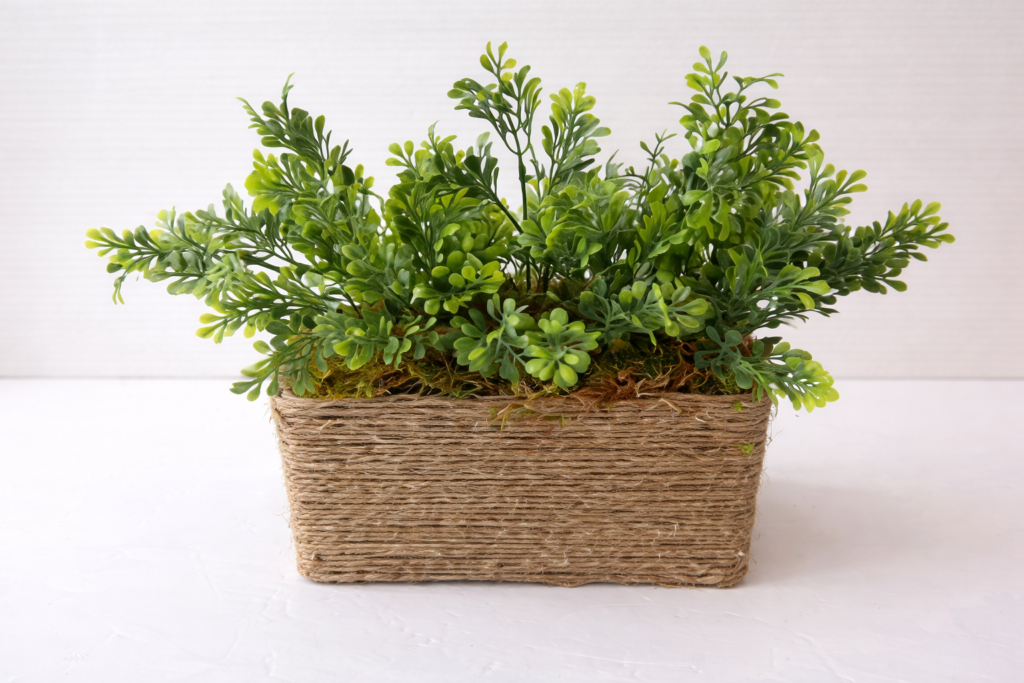
Now comes the fun part!
I cut the boxwood picks and began inserting them into the sponge. I spread them out evenly to create fullness.
For the front section, I trimmed some picks a little shorter so the arrangement wouldn’t look too tall in front. Layering different heights really helps it look balanced and natural.
I kept adjusting until it looked full and evenly shaped.
Step 5: Add the Lavender

Next, I added the lavender stems using the same method.
I spread them around the arrangement, making sure they were balanced on both sides and slightly varied in height. The lavender adds softness and just the right pop of purple.
Step 6: Insert the Easter Eggs & Carrots

Once the greenery and lavender looked balanced, I added the Easter egg picks and carrots.
I placed them at different angles and heights so they didn’t all sit at the same level. That helps create movement and keeps the arrangement from looking flat.
Step 7: Add Decorative Twine Details
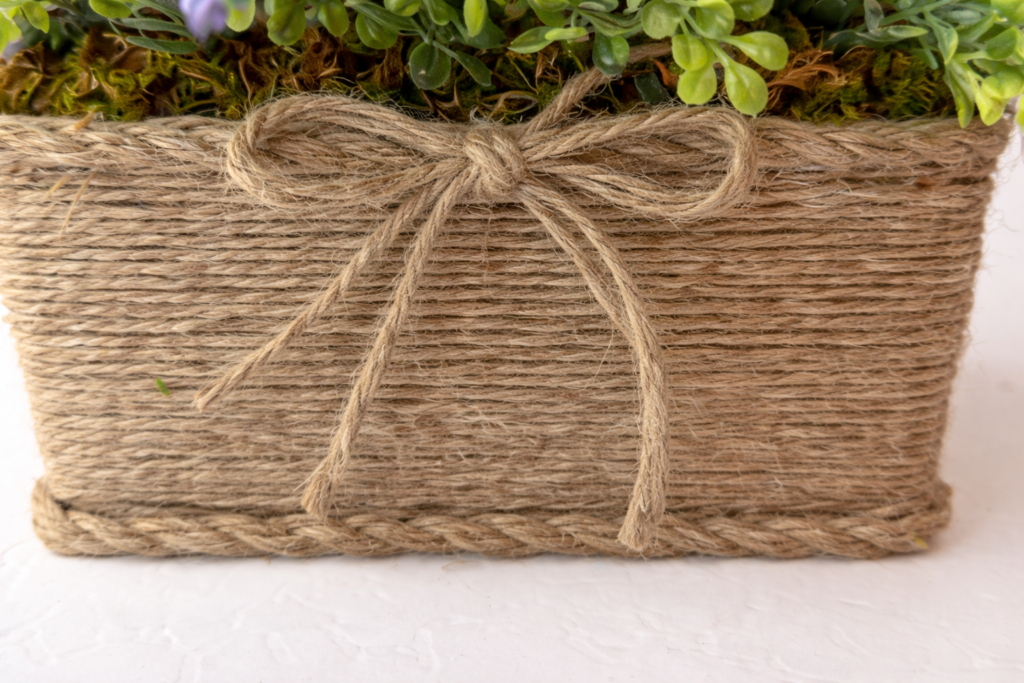
To give the box a little extra charm, I created a simple decorative rope detail.
I intertwined two strands of twine together, then repeated it with another two strands. I attached this braided detail along the top and bottom edges of the box.
Finally, I made a simple bow and glued it to the front for a finished, rustic touch.
And that’s it — the finished Easter arrangement!
It started as a simple tissue box and affordable spring picks, and it turned into a cozy, handmade piece that feels perfect for the season.
DIY Spring Porch Planter Using Leftover Greenery
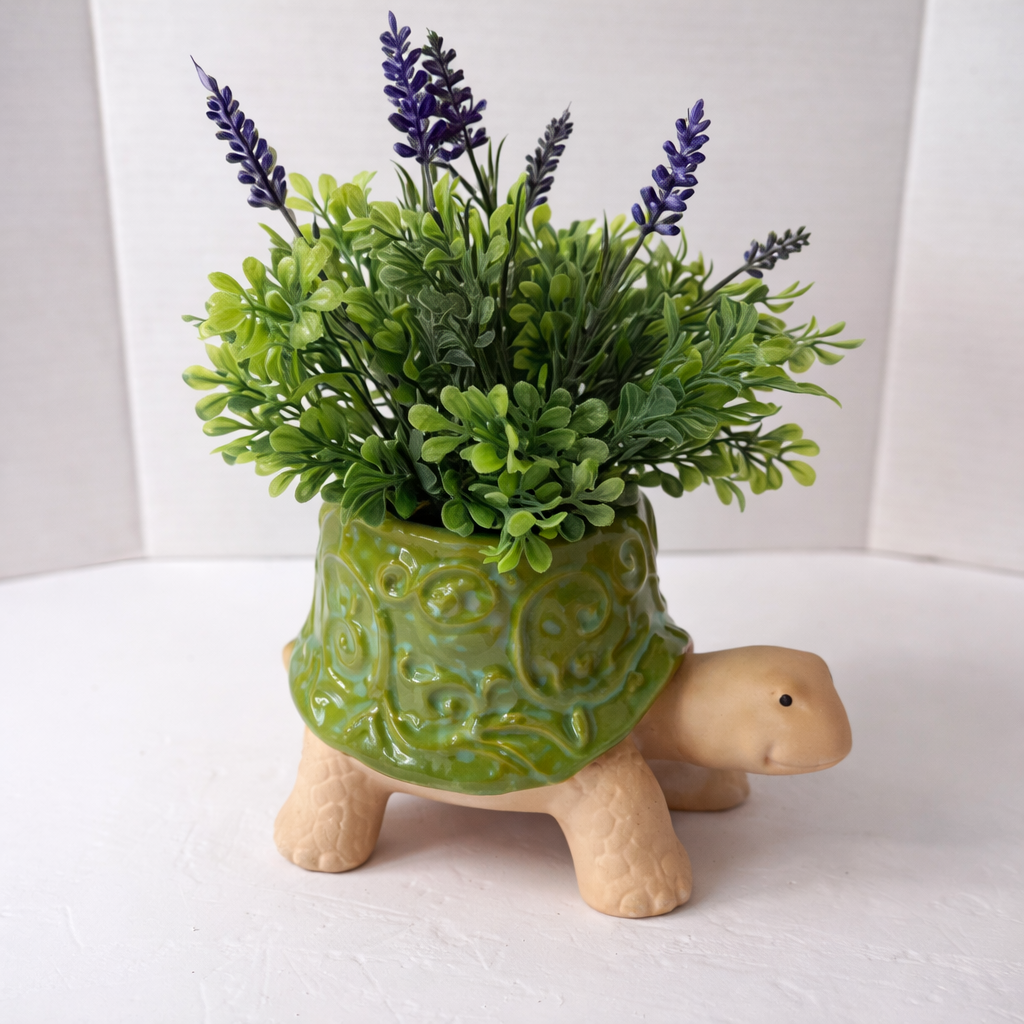
After finishing the larger arrangement, I noticed I still had some leftover greenery and lavender stems. Instead of putting them away, I decided to create something small and simple with what I had left.
That’s when I turned to my little turtle planter.
I didn’t want anything too full or dramatic for this one — just something fresh and welcoming. I trimmed the leftover greenery to fit the planter and arranged it so it looked soft and balanced. Then I tucked in a few lavender stems for a subtle pop of purple.
This smaller piece is going out on our front porch.
Our porch definitely needs a little love, and this felt like the perfect starting point. It’s amazing how even one small arrangement can make an entryway feel more inviting. I love the idea of guests being greeted by something cheerful and handmade before they even step inside.
It’s simple, but it adds personality — and sometimes that’s all a space really needs.
I also love that this project allowed me to use every bit of what I purchased. Nothing wasted. Just layered into something beautiful for another corner of our home.